These test files have 21 different densities on them. The first one is made for scanning with a flatbed scanner. It has a black background to help reduce flare.
The others have differing information relating to densities that can be helpful in making curves for different papers. Those with the density markings are, as of 3/13/06, "untagged." That is, they have no embedded profiles. I use different test files for different purposes, depending on the dmax of the paper-ink combination and whether the printing workflow is "color managed" or not.
The older UT2 and UT7 workflows were not color managed. With them I used a density of 0.61 for the 50% midtone. While the midtone densities are the same, those papers with higher maximum black densities will also have progressively higher shadow densities, starting at about 75%.
Later workflows, including those that use Create ICC, are "color managed." With them the print densities will depend on the working space that is used, usually set in Photoshop's Color Settings area (Edit>Color Settings). I recommend Gray Gamma 2.2 for the gray working space and AdobeRGB (1998) for the color working space. I have two 21-step files that show the typical densities for either matte papers (dmax of Lab L 16) or glossy papers (dmax of Lab L 5). These test files include "GG22" in their names to indicate they are for Gray Gamma 2.2 working space.
21-Step_Black file for scanning,
21-Step_L-16_GG-22.tif (Gray Gamma 2.2 for typical matte paper)
(This file has an embedded Gray Gamma 2.2 profile.)
21-Step_GG22_L5.tif (Gray Gamma 2.2 for typical glossy paper)
Note that my scanners colors and densities may differ. So, don't expect an exact match.
The scanned images have on then what settings were used.
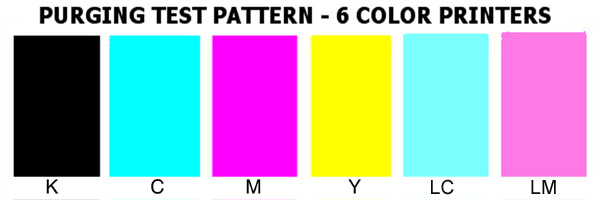
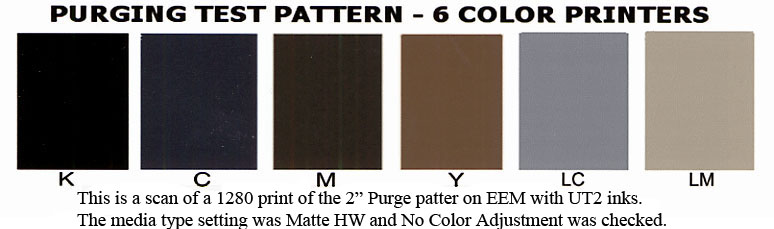
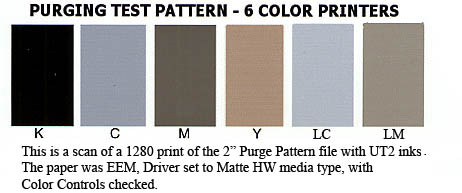
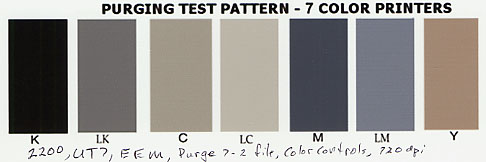
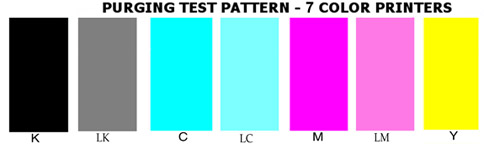
It is a good practice to print a purge pattern to keep track of the colors of the inks in your inkset. As you buy new cartridges, you will then have a frame of referrence should it appear that the inks may have changed.
You can just click on these file names, and they should appear on your monitor. They right click on the image and "Save Picture As..."